The Tap Guide
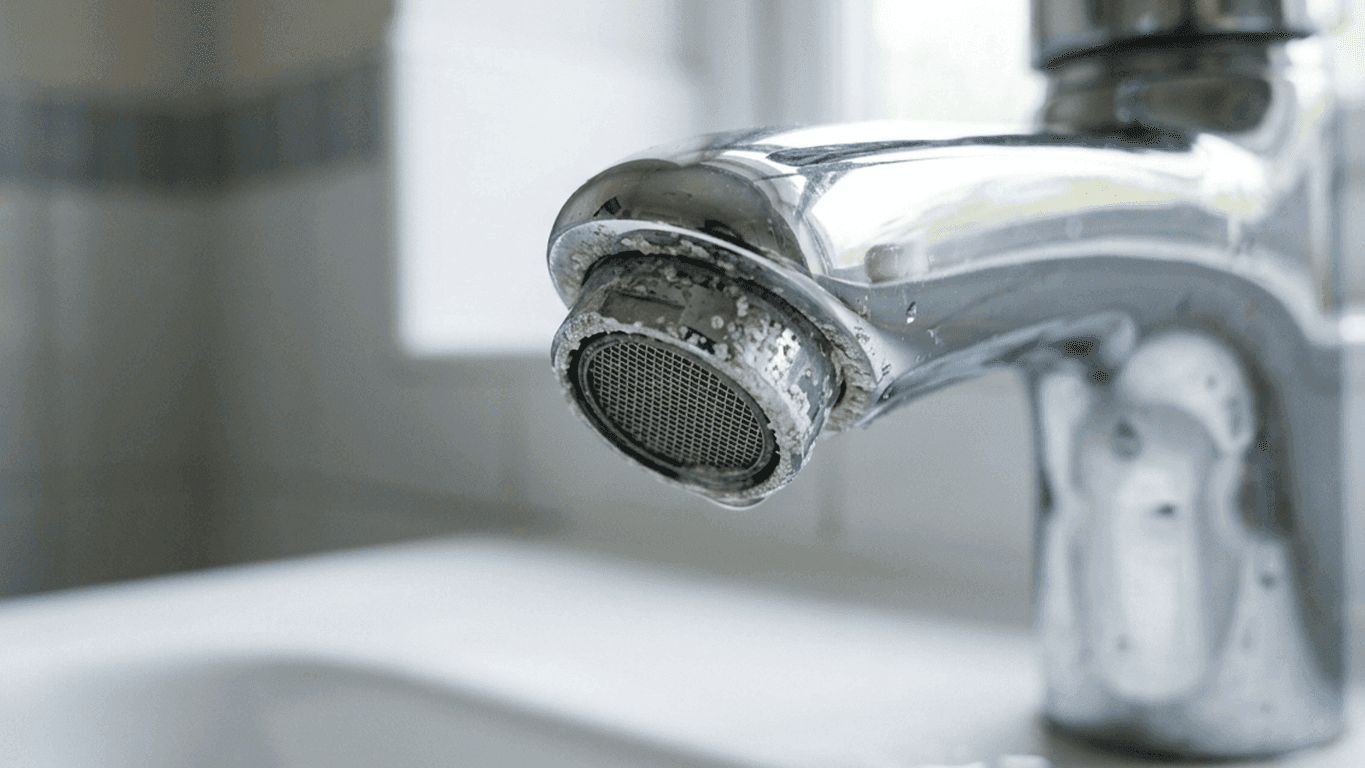
If you live somewhere with hard water, you'll know the drill: a white, crusty ring around the tap base, a spout that's lost its shine, maybe a shower head that's suddenly lost half its pressure.
Limescale causes all of it, and while a quick wipe deals with what's visible, this guide covers the damage you can't see too, why limescale forms, how it gets into aerators and cartridges, which cleaning approach suits which finish, and what actually stops it coming back for good.
Quick answer
Soak the affected part in white vinegar or a citric acid solution for 15 to 30 minutes, then scrub gently with a soft brush, rinse and dry straight away. Cut that soak to 5 to 10 minutes and skip the scrubbing on matt black, brushed or lacquered finishes, since strong acid left on too long can dull or etch a coating that plain chrome would shrug off.
Where a part unscrews, like an aerator or a shower head, take it off and soak it separately rather than trying to descale it in place.
What limescale actually is, and why some parts of the UK get it worse
Limescale is calcium carbonate. It's left behind when water carrying dissolved minerals evaporates off a surface or gets heated, and those minerals, mainly calcium and magnesium, come from rain picking them up as it filters through chalk and limestone.
Where your local geology is chalky or limestone-heavy, the water reaching your tap is what's known as "hard". Where it isn't, you get "soft" water with much lower mineral content.
The UK has a genuine divide here. Much of the south east, East Anglia and large parts of the Midlands sit on hard to very hard water, while Scotland, Wales and the north west generally get off far more lightly.
The Consumer Council for Water publishes a postcode-based hardness map, and it's worth a look if you've never checked, because it changes how seriously you need to take all of this.
In a soft water area, you might go years without giving limescale a second thought. In a hard water one, it can clog a tap aerator within weeks and leave visible marks within days of cleaning it off. If you're replacing a tap anyway, our guide to the best tap for a hard water area covers the finishes and cartridges that make limescale far easier to live with.
It's not just cosmetic: what limescale does inside your taps
The white marks around the base are the part everyone notices, but they're actually the least of it. Limescale builds up anywhere water sits, evaporates or passes through tight gaps, and taps are full of exactly those conditions.
- The aerator, that small mesh disc screwed into the end of the spout, is usually the first thing to suffer. Its job is to mix air into the water flow so it comes out smooth rather than splashing everywhere, and limescale clogs the tiny holes surprisingly quickly.
- Shower heads are worse again, since they've got dozens of small nozzles that mineral deposits can partially or fully block, which is why an old shower head often ends up with half its jets pointing the wrong way or barely working at all.
- Inside the tap body, limescale can coat the cartridge or ceramic disc valve that controls the flow, making the handle stiffer to turn and, eventually, stopping it seating properly. That's a common hidden cause of a tap that won't fully shut off, and it's worth reading our guide on how to fix a dripping tap if that's the specific symptom you're dealing with.
- Even the flexible tap connectors and isolation valves underneath the sink can scale up over the years, though you'd normally only notice that when a plumber has the cupboard open for something else.
None of this happens overnight, but it's cumulative. A tap that's fine for the first two or three years in a hard water house can start showing real symptoms not long after, simply because the deposits have finally built up enough to interfere with moving parts rather than just sitting on the surface.
Chrome, brushed, matt black or brass: different finishes need different care
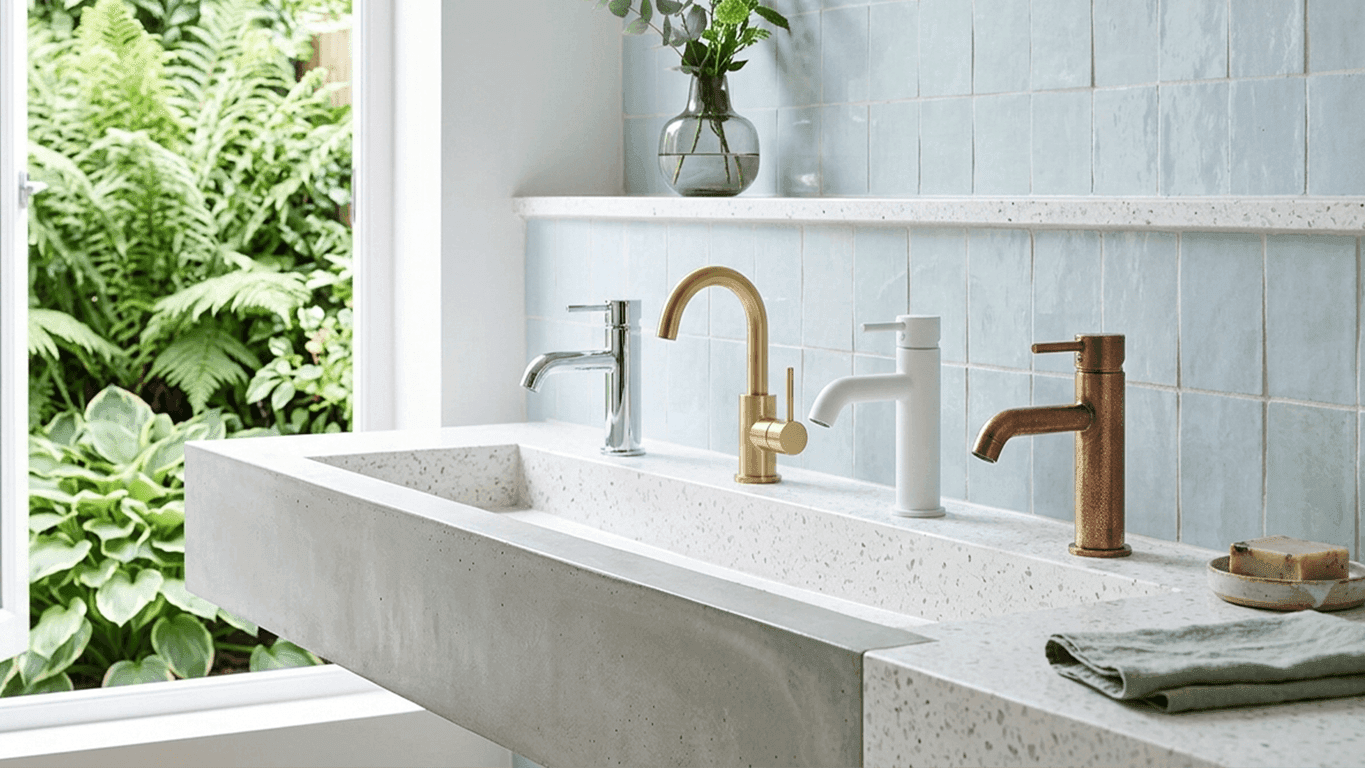
Chrome is the most common tap finish in the UK, and it stays looking sharp with the right routine, though it's just as easy to dull or scratch with the wrong one. A daily wipe with a soft, damp microfibre cloth, particularly around the base where water tends to pool, followed by drying with a separate dry cloth straight after, is the single habit that does the most to stop new limescale and water spots forming in the first place.
Abrasive scourers, scouring powders and anything containing bleach are worth avoiding altogether on chrome, since bleach in particular can react with the plating and cause pitting or discolouration with repeated use.
If a faint chalky haze has already settled on the spout or base, this fixes it on chrome specifically without needing to strip anything down: soak a cloth in white vinegar and wrap it around the affected area for 15 to 30 minutes, remove it and gently scrub with a soft brush or old toothbrush to loosen the softened limescale, then rinse thoroughly and dry immediately with a soft cloth.
This wrap-and-soak method is for the visible chrome surface only. The method that suits chrome isn't automatically safe for everything else.
Matt black taps are the ones to be most careful with. The coating is usually a PVD (physical vapour deposition) finish rather than solid metal, and strong acidic descalers left on too long can dull or etch it, especially if you're scrubbing rather than just soaking and wiping.
Brushed finishes, whether nickel, brass or steel, show streaks and water spots more obviously than polished chrome, so a gentler approach with more frequent light cleaning tends to work better than an occasional aggressive one.
Brass, particularly unlacquered brass, is meant to develop a patina over time, and heavy descaling can strip that back to bright metal in patches, which usually looks worse than the limescale did.
If you're not sure what you're working with, a soft cloth and a much shorter soak time than you'd use on chrome is the safer starting point, and it's always worth checking the manufacturer's own cleaning advice if the tap came with any documentation.
Step by step: removing visible limescale from the tap body and base
This is the job most people actually searched for, the ring around the base and the crusty patch under the spout, and it's the same basic method whatever finish you're working with, just with the timings adjusted as above.
- Wipe away any loose dirt, soap scum or toothpaste splashes with a plain damp cloth first, so the descaling solution is working directly on the limescale rather than sitting on top of grime.
- Soak a cloth or a few sheets of kitchen roll in white vinegar or a citric acid solution, wring out the excess so it isn't dripping down the cabinet, and wrap it around the worst-affected area. The base of the spout and the collar where the tap meets the sink are usually the thickest patches.
- Leave it in place for 15 to 30 minutes on chrome, checking after 5 to 10 minutes on matt black, brushed or lacquered finishes rather than assuming the longer time is safe.
- Unwrap it and gently work over the area with a soft brush or an old toothbrush to loosen anything left behind. On coated or brushed finishes, go very gently or skip the scrubbing altogether, since that's what actually causes most visible damage, not the vinegar itself.
- Rinse thoroughly with clean water to clear any trace of acid, then dry the whole area immediately with a soft, dry cloth. Letting it air dry just restarts the evaporation process that caused the limescale in the first place.
- If a patch doesn't lift first time, repeat the soak fresh rather than leaving the original cloth on for hours. Several short soaks are gentler on the finish than one long one.
How to descale an aerator
This is usually the single most useful thing you can do for a tap's flow rate, and it costs nothing but a bit of time. If descaling doesn't bring the pressure back, our guide on increasing water pressure from a tap covers the other likely causes.
- Turn off the water supply if you're at all worried about splashing, though for just the aerator it's not strictly necessary.
- Grip the aerator with a cloth and unscrew it anticlockwise from the end of the spout. Most turn by hand; a few need a small pair of pliers wrapped in cloth to protect the finish.
- Take the aerator apart over a sink or bowl, noting the order of the washers and mesh discs so you can put it back together the right way round.
- Soak the parts in white vinegar or a citric acid solution for thirty minutes to a few hours, depending on how badly scaled they are. Citric acid sachets, sold cheaply in supermarkets, work just as well and smell far less than vinegar.
- Use an old toothbrush to gently work off any remaining deposits from the mesh, then rinse everything thoroughly under running water.
- Reassemble in the same order and screw the aerator back on, tightening by hand until snug. Don't overtighten, it doesn't need much force and you risk stripping the thread.
Practical tip
If an aerator is badly corroded or the mesh has actually crumbled rather than just clogged, it's cheaper and quicker to replace it than to keep fighting with it. Universal aerators cost only a few pounds and fit most standard tap threads.
A replacement aerator worth a look
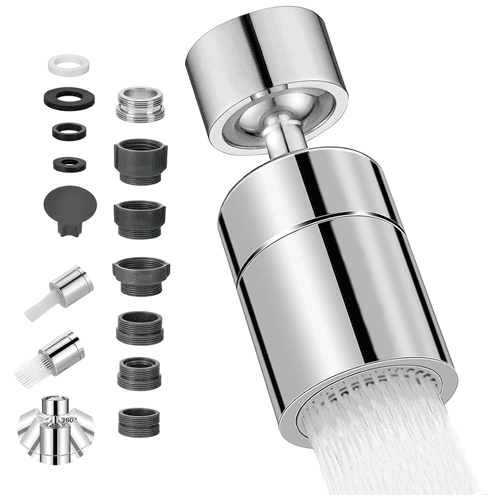
Lubekas Kitchen Tap Spray Head
£13.99 (correct as of October 2026)
A screw-on spray diverter with two flow settings, a soft foaming spray and a stronger jet, built around a solid brass swivel head that turns a full 360° to reach across a wider sink. It also comes with a four-layer internal filter to catch sediment before it reaches the nozzle, plus six adapters covering 20mm, 22mm and 24mm threads, so it's a genuine drop-in fit for most standard UK kitchen taps.
We like
- Six included adapters cover 20mm, 22mm and 24mm threads, so it fits most UK kitchen taps without buying parts separately
- Four-layer internal filter helps catch sediment and reduces the chance of the nozzle clogging over time
- Solid brass swivel head rotates a full 360°, useful for reaching across a wider sink or double bowl
Worth checking
- Only two flow settings, foaming spray and a stronger jet, with no separate pause function, despite sitting at the price point where our guide notes a pause function usually starts appearing
- Thread size
- 20mm, 22mm and 24mm (adapters included)
- Materials
- ABS housing, brass swivel head
- Finish
- Chrome
- Flow modes
- 2: foaming spray and powerful jet spray
- Filter
- 4-layer internal filter
- Weight
- 70g
Specifications above listed by Amazon and may change. Check the current listing before buying. If we've got something wrong, let us know and we'll fix it.
How to descale a shower head
Shower heads scale up faster than taps because they're wet almost constantly and often have narrower jets to begin with. The same finish rules from above apply here too, so if yours is matt black or another coated finish rather than plain chrome, keep the soak on the shorter end and skip the scrubbing.
- If the shower head unscrews easily from the hose, remove it and submerge it fully in a bowl of white vinegar or citric acid solution for an hour or two, or shorter if it's a coated finish.
- If it's fixed and awkward to remove, fill a sandwich bag with the same solution, fasten it around the shower head with an elastic band so the holes are fully submerged, and leave it in place for a similar length of time.
- Afterwards, scrub gently with an old toothbrush, focusing on each nozzle, then run the shower on full for a minute or two to flush out any loosened debris before you use it properly.
If half the jets still aren't working after a proper soak and scrub, the internal plate has likely scaled up beyond a simple clean, and at that point a replacement shower head is usually the more sensible option than trying again.
They're inexpensive and widely available from hardware shops and online, so replacing one outright is often simpler than repeated descaling once it's old or heavily scaled.
Vinegar, citric acid or a shop-bought descaler: which should you use
All three dissolve limescale the same way, by using acid to break down the calcium carbonate, but they suit slightly different jobs.
- White vinegar is the cheapest option and sits in most kitchen cupboards already, which makes it the obvious first thing to reach for. Its main downside is the smell, which lingers in a bathroom far more than a kitchen, and it's a mild acid, so heavy scale needs a longer soak to shift.
- Citric acid, sold as crystals in most supermarkets, dissolves in warm water to make a solution that works just as well as vinegar on limescale but with almost no smell. It's a similarly mild acid, so soak times are comparable, but it's the more pleasant option to use indoors and lasts a long time from one bag.
- Shop-bought gel descalers, the branded products such as Viakal sold specifically for bathroom limescale, typically use a stronger acid such as hydrochloric or sulphamic acid and are formulated to cling to vertical surfaces without dripping straight off. They work faster on heavy build-up, which makes them useful for a badly neglected tap, but that extra strength is also why they're the ones most likely to damage matt black, brushed or lacquered finishes if left on too long. Always check the label against your specific finish before using one, since not every gel descaler is safe on coated taps.
For routine maintenance and anything other than a heavily coated finish, vinegar or citric acid does the job for next to nothing. Save a shop-bought gel descaler for a genuinely stubborn patch on a plain chrome or steel finish, and treat it with caution everywhere else.
How to tell if you're in a hard water area without checking a map
The Consumer Council for Water's postcode map mentioned earlier is the most reliable source, but there are a few practical signs worth knowing if you want a quick answer without looking anything up.
- Kettle scale. A layer of white flakes building up inside a kettle within a few weeks of descaling it is one of the clearest signs of hard water, since a kettle heats and evaporates water constantly.
- Poor lather. Soap and shampoo struggling to foam properly, or leaving a slightly filmy residue on skin, is a classic hard water symptom, caused by the dissolved minerals reacting with soap rather than rinsing cleanly away.
- Spotty glassware. Glasses and cutlery coming out of the dishwasher with a cloudy, spotted finish even on a proper wash cycle points to hard water rather than a fault with the dishwasher itself.
- Cheap water hardness test strips. Sold online and in some hardware shops for a few pounds, these dip into a glass of tap water and change colour to give an approximate hardness reading within a minute, which is the closest thing to a definitive home test without sending a sample off for analysis.
None of these are as precise as the postcode map, but if you're seeing two or three of them together, it's safe to assume you're dealing with genuinely hard water and plan your cleaning routine accordingly.
When limescale is bad enough to actually affect flow rate or cause a drip
A little limescale on the surface is cosmetic. Build-up inside the tap is a different matter entirely, and there are a few signs that tell you it's crossed that line.
If the flow from a previously strong tap has noticeably slowed and cleaning the aerator doesn't fully restore it, the scale has likely built up further inside the spout or the valve itself.
A tap that's started dripping steadily rather than just occasionally often has limescale sitting on the seat of a ceramic disc cartridge, one of the most common causes, preventing the two discs from sealing flush against each other even when the handle is fully off.
It's worth checking what flow you should actually expect from your tap in the first place, since a tap that's always been on the slower side might just be doing what it was designed to do rather than suffering from scale.
Our guide on what flow rate you need covers typical figures for kitchen and bathroom taps if you want a baseline to compare against. If descaling the aerator and giving the tap a thorough clean doesn't improve things, the cartridge itself is the next thing to look at, and that's a straightforward job for most competent DIYers or a quick one for a plumber if you'd rather not take the tap apart yourself.
What it actually costs
The good news is that dealing with limescale properly doesn't need to cost much at all. Prices below reflect our last check and will drift a little over time, but they give you a realistic sense of scale.
Descaling with white vinegar or citric acid is close to free, since a bag of citric acid crystals from the supermarket costs a couple of pounds and lasts for dozens of soaks.
A replacement aerator typically runs to a few pounds, and a new shower head anywhere from around £10 for a basic model upwards, so even a full refresh of the parts most affected by scale is a fairly small outlay.
Replacing a scaled-up cartridge is a bigger job but still modest, usually somewhere between £10 and £40 for the part itself depending on the tap brand, plus labour if you're paying someone to fit it.
The one cost that actually adds up, if you decide to tackle the root cause rather than keep treating the symptoms, is a whole-house water softener.
Installed units typically start around £400 for a straightforward system and can run past £1,000 for larger households or higher-spec models, plus ongoing salt costs of a few pounds a month.
It's a real investment, but if you're in a very hard water area and tired of descaling every appliance in the house on rotation, it's the one upgrade that stops the problem at source rather than chasing it room by room.
Preventing limescale for good
If you're only ever descaling reactively, once flow has already dropped or marks have already appeared, you're always a step behind.
A simple wipe-down of taps and shower screens after use, so water doesn't sit and evaporate on the surface, makes a genuine difference to how quickly visible limescale builds, even if it does nothing for what's happening inside the pipework.
For the internal side of things, a whole-house water softener is the most effective fix in a hard water area, since it removes the calcium and magnesium from the water before it ever reaches a tap, shower head or appliance, and cartridges, aerators and finishes all stay noticeably cleaner for longer as a result.
It's not without trade-offs, though. Softened water feels noticeably different, often described as slippery or soapy, since without the dissolved minerals soap doesn't rinse away in quite the same way, and not everyone takes to it. It also isn't generally recommended for drinking or cooking because of its slightly higher sodium content, which is why most installations keep a separate unsoftened tap in the kitchen for drinking water alongside the softened supply feeding everything else, worth planning for at the point of installation rather than discovering afterwards.
There's also the ongoing cost of running the softener itself, including regularly topping up the salt. A softener is really only worth the outlay if you're in a genuinely hard water area, and any standard tap works fine on a softened supply without needing anything special to accommodate one.
The Energy Saving Trust has noted that scale build-up on heating elements and in pipework can reduce efficiency over time, which is another reason softened water tends to pay for itself gradually through lower energy use on things like immersion heaters and combi boilers, alongside the more obvious benefit of taps and shower heads staying clear for longer.
Electronic or magnetic scale inhibitors, the sort that clamp onto a pipe without altering the water chemistry directly, are a cheaper alternative some households try, though the evidence for how well they work is mixed and results seem to vary a lot by water hardness and household.
If you're not ready to commit to a full softener, a scheduled routine, descaling shower heads every four to six weeks and aerators every couple of months rather than waiting until they're clearly struggling, is a realistic middle ground that keeps on top of things without much cost or effort.
Cleaning mistakes that make it worse
- Using strong descaler on matt black or brushed finishes without checking first. What's safe on chrome can dull or etch a coated or brushed surface, so test on a small area or use a much shorter soak time.
- Scrubbing with wire wool or metal scourers. These scratch every finish, including chrome, and once a surface is scratched, limescale and grime grip onto it even more easily next time.
- Ignoring the aerator until flow has already dropped noticeably. By the time you notice weak flow, the mesh is usually badly clogged. Descaling it every couple of months in a hard water area avoids that entirely.
- Assuming a dripping tap needs a new washer without checking for scale first. Limescale on a cartridge seat is one of the most common causes of a persistent drip, and no amount of washer changing fixes that.
- Overtightening the aerator or shower head on reassembly. Both only need to be snug by hand. Overtightening strips threads and can crack plastic housings on cheaper fittings.
- Leaving descaling solution on for far longer than needed "to be thorough". Longer isn't always better, particularly with anything acidic on a coated finish, and can cause more damage than the limescale itself would have.
- Using a strong shop-bought descaler without checking the manufacturer's care guidance. Some tap warranties specifically exclude finish damage caused by abrasive or strongly acidic cleaners, so it's worth a quick check before reaching for the strongest thing under the sink.
Sorted properly, limescale is one of the cheapest maintenance jobs in the house to stay on top of, it just needs doing regularly rather than as an occasional rescue mission.
If you're weighing up whether to repair or replace a badly scaled tap altogether, our guides on choosing a kitchen tap and our tap brands guide are a good next stop, and if a full replacement is on the cards, how to install a tap covers what's involved in fitting the new one yourself.